
This weekend I took some time to create with the copper embossing ArtBox from the Ann Arbor Art Center (this ArtBox is free to all U of M students with a Passport to the Arts)! This was my first experience working with copper, and I had never done any sort of embossing before. My only exposure to copper embossing was an awareness that it existed from old copper embossing pieces that used to hang at my grandparents’ house. Back then it seemed fantastically complex and difficult, but this project turned out to be simple and fun to complete!
Everything I needed to complete the project was included in the ArtBox, including the sheet of copper, a piece of foam to work on top of (to avoid embossing whatever is underneath :), the wooden embossing tool, sticky tape to attach the frame, and the frame itself (which I thought was a nice touch). There was also a piece of paper the same size as the copper square for a practice sketch, and a detailed set of instructions. I found the instructions to be very detailed, clear, and easy to follow. About half of the instructions were dedicated to the technical details of how to emboss copper, and the other half were dedicated to developing the “zentangle” art form suggested with the kit. The zentangle instructions are really nice if you’re also suffering a persistent case of artblock, or if you’re just not sure how to get started.
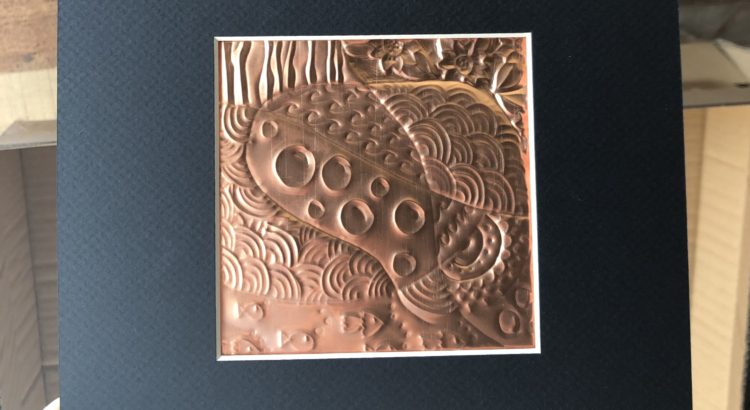
The first step was developing my paper sketch. Originally, I got pretty detailed on the paper version since I knew the paper was scaled exactly to the size of the copper sheet, and I assumed I could simply overlay it on top of the copper and trace along the pencil lines. I did this to trace my original long, winding, pattern divider lines but realized quickly it wasn’t going to work out well for the rest of the piece. Firstly, the instructions advise (and I concur) alternating the sides you’re embossing on to create different raised and recessed designs. However, to do this, you need to flip over the sheet of copper…and you won’t be able to see your paper that you taped to the other side. The second problem was that tracing over the paper made it harder to apply the force I needed to properly emboss the copper. You need to press harder than you think you do to get a good line (the foam allows you to apply some serious pressure without fear). The takeaway here is not to overdo your sketch. Sketching out the dividing lines and tracing those can be useful, but after that I started using my sketch as just a very loose guidelines for the types of patterns I wanted to put in different areas—and I ended up straying from the sketch a decent amount.
In the end, I had a lot of fun and I would definitely recommend it as a relaxing way to try a new art form. It’s something I haven’t seen opportunities to learn about very many times in my life, so I would take advantage of this one to try it out in a low stakes way! If you end up loving it, I did a bit of researching and found out that it’s not as expensive a hobby as I might have thought!
