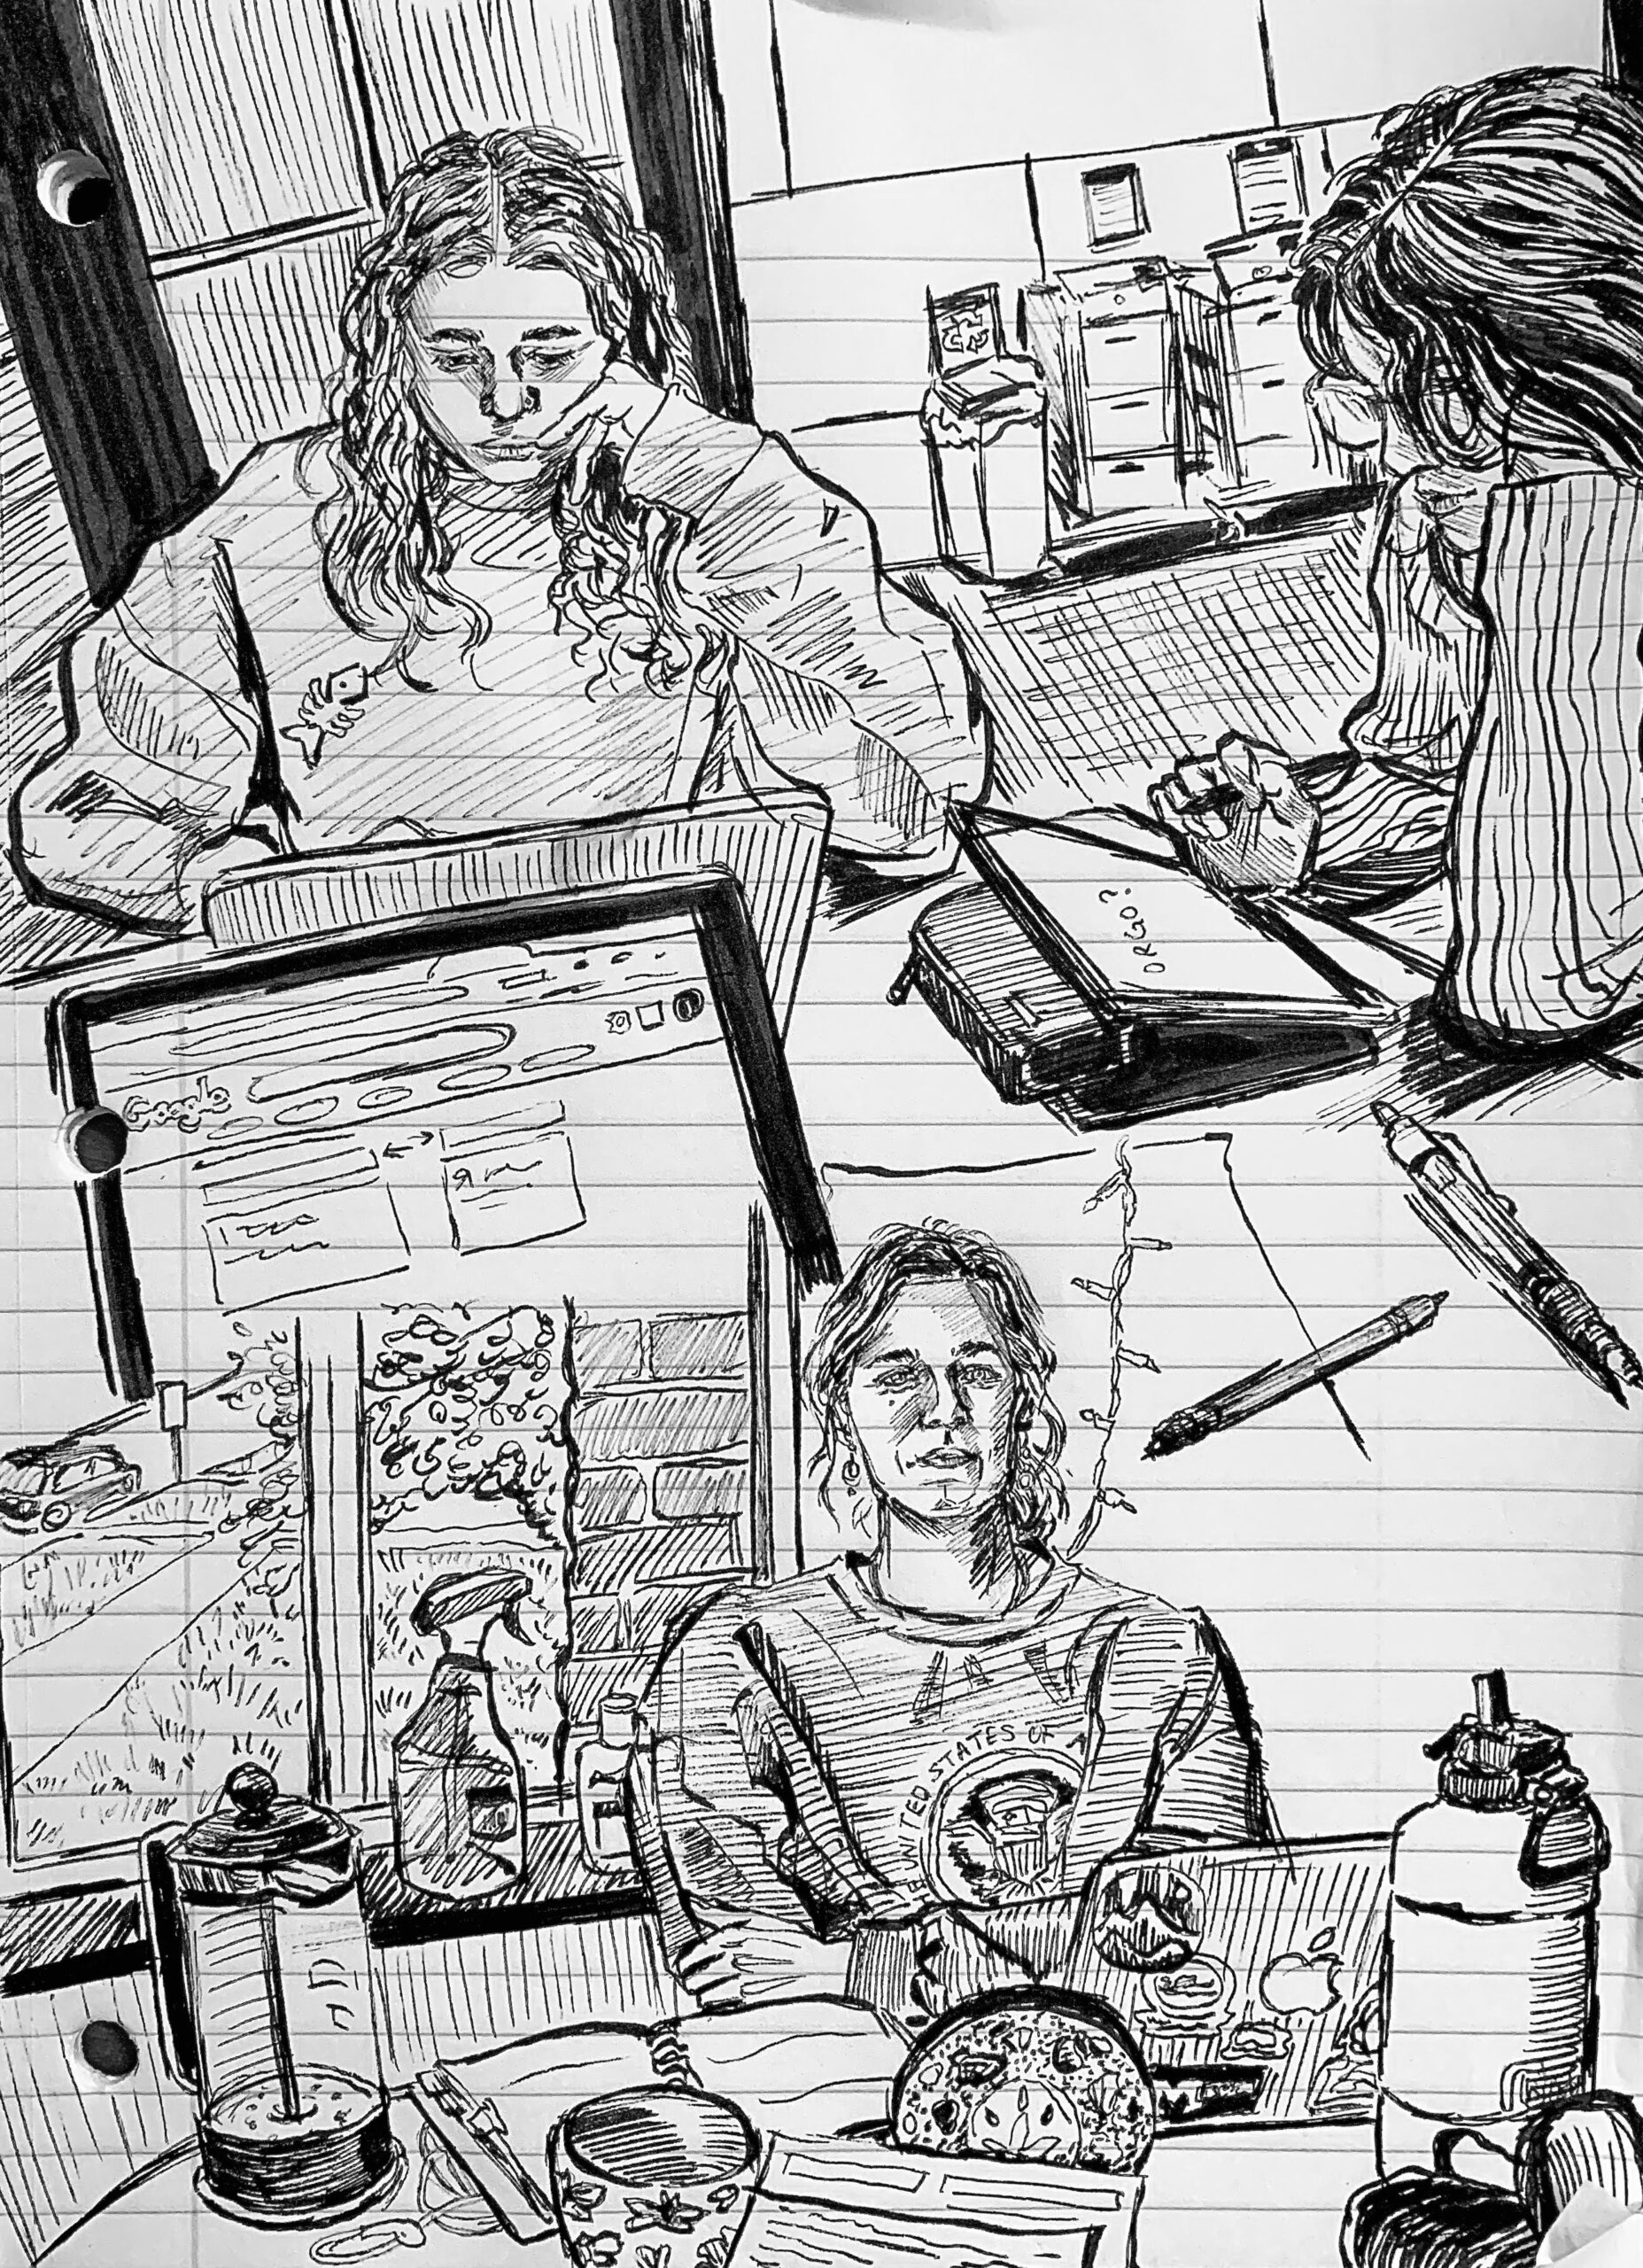
Hi again! I’m not sure how much this drawing counts as “people watching”, but who says “people” has to mean “strangers”? I’ve been spending a lot of time this past week opposite my friends just studying and I think today’s post portrays that rather accurately. Drawing on notebook paper instead of my sketchbook felt particularly fitting. The top image took place in the LSA building (where I spent six and a half hours today), and the bottom was in my friend’s apartment. I loved noticing how much stuff we surround ourselves with while studying: laptops, tablets, water bottles, my two indispensable pens, so many notebooks, planners, and… a french press? I suppose caffeine is a must. Good luck to everyone taking exams this week (I know I’ll need it)!
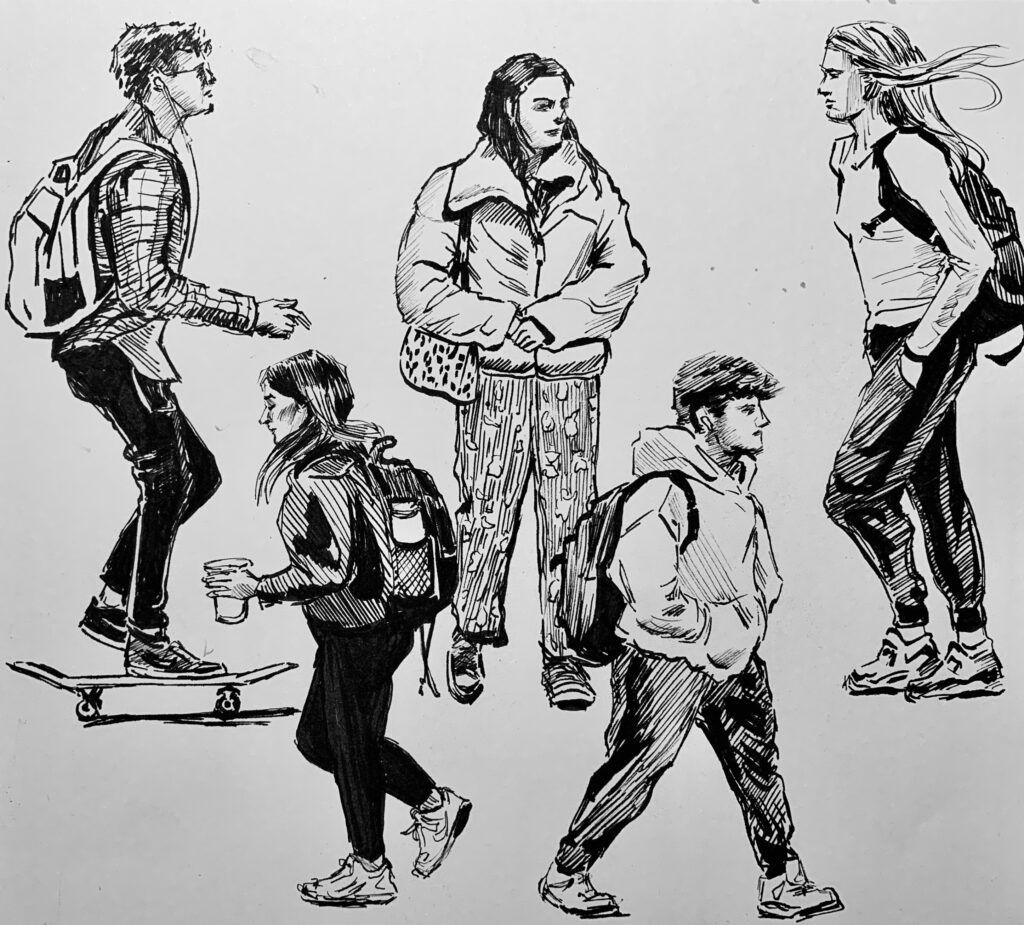
Hello everyone! This is my very first post on People Watching. I actually struggled a lot when trying to come up with who/where to draw for my first post, so I ended up going in a pretty simple direction. Each of the students I drew was spotted walking (or skateboarding) in front of the UMMA and Union on Wednesday October 18th, 2023. I really enjoyed just using marker here but a goal for the future is to branch out into more colorful illustrations that still feel consistent with my style.
Welcome back to another post! Today is all about faux calligraphy, so let’s start by explaining what that even is.
Faux calligraphy got its name by, as you might have guessed, being a sort of “fake” form of calligraphy. Where traditional calligraphy uses a brush pen to get those thin upstrokes and thin downstrokes, faux calligraphy allows you to get the same technique with a regular old pen (or, really, any sort of pencil, marker, etc that creates a standard line).
In this example, the top version is regular calligraphy with a brush pen, while the bottom version is faux calligraphy using a marker with a bullet tip.
So how does this work? It’s actually pretty simple, which is why a lot of people, especially beginners, prefer it over traditional calligraphy. A lot of beginners also use it as a gateway into traditional calligraphy, because it uses the same principles without requiring the technique involved in using a brush pen.
To start, you can just write whatever word/letter/phrase you have in mind. This can be in cursive, or in print, whatever you prefer! The next step is the key: you need to identify all the downstrokes. In the example below, I showed where the downstrokes are on the cursive letter “a”, but if you want a more comprehensive guide, I have a few other blog posts about handlettering basics that should help you out! Once you identify where all the downstrokes are, you simply make those lines thicker, whether by drawing an outline and filling it in like I did, or by just adding a few extra lines around it.
Find the downstrokes, outline them, and fill them in 🙂
Here’s a little alphabet guide to help if you’re struggling with the downstrokes, too
Once you’ve got the basics down, this another style where there are a lot of fun variations to play around with. I included some of my favorites below, to show that you can do this with cursive or print, vary the thickness of the downstrokes, bring in color, etc. With the “lazy” and “hard” styles, the lazy one is just what you’ve been doing already (it isn’t lazy, it’s just easier than the hard version). The “hard” version is where you kind of map the downstrokes out in your mind ahead of time so that the lines don’t intersect and downstrokes remain solid white. This takes some practice to get the spacing right, which is why I called it the hard version, but it’s definitely not impossible and can be really fun to practice!
I hope you enjoy trying out a new style, or at least learning about it, and for all the umich students out there, have a great spring break!
Welcome back y’all! I hope everyone had a great break and isn’t feeling too overwhelmed about getting back into school.
As I’m sure you’ve all realized by now, the size of my pen collection is a bit absurd, and definitely not the most conducive to college housing. I had to leave a lot behind when I came to school, so whenever I go home, I get really excited to use them all again. I have a lot at home right now, and a little more room than I thought I would for pens, so I thought it would be fun to show you guys how I went through them all and picked what to bring back to Ann Arbor. For the major pen sets, I included their swatches and my opinions on them below. I know the swatches for some of the smaller pens are really tough to see, but I hope you can at least kind of see the colors and the size of the nib. I did also bring home the posca set you can see in the box picture, but I forgot to take pictures of those swatches.
After that came all the random, individual pens. I tested a ton, but here are the ones I brought back. From left to right:
Pentel Tradio Stylo Sketch Pen: so smooth and precise, very fun to write with
Uni Ball Signo 207: Very smooth and a great pen for writing, plus I have the rest of this set in Ann Arbor anyway
Bcmini Donut Bear Pen: Besides being adorable, this pen is so incredibly smooth and fun to write with
Uni Posca: Posca pens are amazing, don’t know why I left this behind in the first place
Campus ViviDry: these are also super smooth and similar to the uni ball signo
It was really hard for me to be so picky and not bring back everything, but I’m super happy with the ones I chose and can’t wait to do some reviews for you guys! Enjoy the week 🙂
Hi everyone! I hope you’re all having a lovely week 🙂
For this week, we’re gonna look at a good set of markers to start with if you’re new to lettering, and talk about some lettering basics at the same time.
This week’s star: Mondo Llama Classic Washable Markers
As you can probably tell, these are technically supposed to be for children. But who cares? If you’re new to art/lettering or on a budget, kids art supplies is the best place to start. The quality is usually pretty high for what you’re paying, you pretty much always get a solid set of rainbow colors, and there’s no reason to feel guilty for overusing them or not taking care of them.
When talking about kids markers, Crayola is obviously the most popular, and for good reason. I plan to do a separate review on Crayola Supertips, because they’re too beloved in the handlettering community to only get a brief mention (so if you don’t know what that means, just stay tuned!). However, this Mondo Llama set does the trick just fine for your basic, broadtip marker. In this specific set, you get 10 colors (swatches below!), and I believe I paid about $2.50 for them, which is ridiculously cheap compared to higher end brands. I actually bought this set at the Target on State Street, too, so it’s super accessible if you’re on campus here.
Getting into the nitty gritty of it, let’s talk about what you can actually do with these. Broadtip markers have a large, conical tip that differs from a brush pen in that the entire tip is firm as opposed to being bendy and flexible. These really in only exist in kids markers, as far as I’m aware, because they’re great for coloring in big spaces. However, you can also use them as a sort of beginner brush pen! A broad tip is firm, but it’s still flexible enough that you can get quite a bit of line variation. You can also tilt the marker so you’re writing with the side of it, which gives you the thickest line. This allows you to do tons of different kinds of handlettering with them, which I showed a bit in the picture above. I know we haven’t talked about lettering styles yet, so that’s more just so show you how versatile these are. Below is a little doodle I did with these markers, just to show you can make some pretty neat stuff with them!
As you can see, they hold up really well in comparison to more expensive art supplies! That said, they are cheap and for children, so they aren’t perfect. I highlighted a few examples of that below. You can see that it’s really difficult to get precise, clean lines with these. They also don’t layer very well, so if coloring in a large space, it might look patchy and have some sections end up lighter than others. These are also water based and pretty juicy, so sometimes they bleed on the page or when interacting with each other as well.
Overall, though, these are a great set of markers that are absolutely worth the small price tag! I hope you enjoyed reading, and see you next week!


 As I’m sure you’ve all realized by now, the size of my pen collection is a bit absurd, and definitely not the most conducive to college housing. I had to leave a lot behind when I came to school, so whenever I go home, I get really excited to use them all again. I have a lot at home right now, and a little more room than I thought I would for pens, so I thought it would be fun to show you guys how I went through them all and picked what to bring back to Ann Arbor. For the major pen sets, I included their swatches and my opinions on them below. I know the swatches for some of the smaller pens are really tough to see, but I hope you can at least kind of see the colors and the size of the nib. I did also bring home the posca set you can see in the box picture, but I forgot to take pictures of those swatches.

 After that came all the random, individual pens. I tested a ton, but here are the ones I brought back. From left to right:


